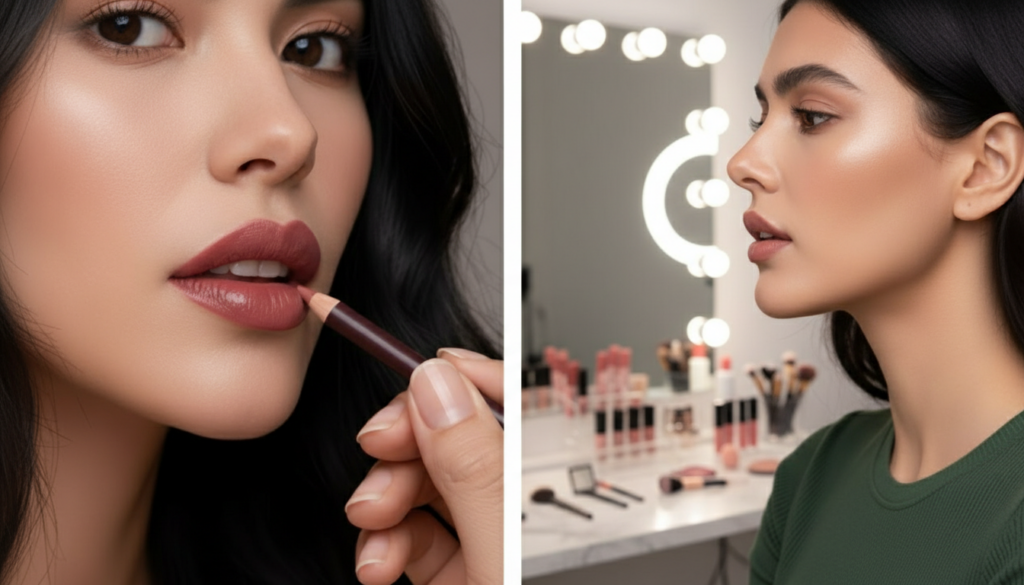
The girl in the café bathroom doesn’t know that anyone is watching her work on her lips, but the quiet queue behind her is. She presses her lips together with two quick strokes of a pencil, then adds some gloss. There is no overlining or layering of contouring. Her lips look soft, healthy, and full, as if she just got back from a relaxing vacation when she looks in the mirro r.
Trick for Putting on Lip Liner
It doesn’t look clear. There isn’t a sharp outline or a bold border like on Instagram. Her lips just look fuller than everyone else’s. You try to copy the look later when you stand in front of your own mirror. You use the same pencil, gloss, and even the same look. But your lips still look flat. The difference is in a small detail of placement that is easy to miss but strong enough to change everything.
Why the Rules for Traditional Lip Liner Don’t Always Work
The old advice is well-known: follow the line of your lips, soften it, fill it in, and move on. A lot of people learned this technique early on, and it worked well for years. But when you use heavy overlining on real faces in natural light, it can feel out of place. It can make your lips look a little out of sync with the rest of your face, especially up close, instead of bringing out your best features.

The Quiet Change That Modern Lip Artists Are Making
The best lip artists today are going in a more refined direction. Instead of trying to make the mouth look much bigger, they focus on leading the viewer’s eye. The fullness you see isn’t the main goal; it’s just a side effect. That’s why the method looks so good in selfies, video calls, and face-to-face conversations. The change is small, but the effect is big.
Why Millimetres Are More Important Than Bold Lines
The change happens through small changes, not thicker lines. Your understanding of lip lining changes once you see where the pencil is really placed. It’s not about changing the shape of your lips; it’s about making the structure that is already there stand out. This level of accuracy makes lips look real, softly enhanced, and never like they were drawn on.
Where Makeup Artists Really Put Lip Liner
You can see the pattern by quickly scrolling through TikTok or Instagram. Artists hardly draw the corners of the mouth. Instead, they put pigment in three specific places: the peaks of the Cupid’s bow, the middle of the lower lip, and the soft “pillows” just off-center. The liner fades toward the edges and is barely there, making an outline that feels more like a suggestion than a statement.
Why the Finish Looks So Real
A makeup artist in London once said that she uses the same lip pencil on all of her clients, but she changes the placement based on how the light hits their lips. A lot of people ask her which filler clinic she recommends. She just laughs and points to a £7 liner and a video of her technique that is not very clear. The most common answer was? “I don’t know what you did, but I feel better.” The effect isn’t just fullness; it’s balance, where the mouth and face finally feel like they go together.
The Science of the Effect in Pictures
This method works because of how the eye sees faces. We don’t look at things evenly; our eyes go to places with contrast and shape change. The dip in the Cupid’s bow, the curve in the middle of the lower lip, and the points where gloss naturally sits all draw the eye. The brain reads the lips as fuller when you make these areas bigger and the corners softer, without any clear outline.
The Exact Liner Placement That Makes Lips Look Full Without Overlining
Start with dry lips and a relaxed mouth. Don’t pose. Use a sharpened nude liner that is the same colour as your lips. Draw a small bridge straight across the Cupid’s bow, connecting the peaks just above where your natural dip is. Instead of a sharp M, think of a softened plateau.
Next, Go to the Middle of Your Lower Lip
Put the pencil about a millimetre outside of your natural line only at the widest point. Draw a short arc that is no wider than your iris when you look straight ahead. Don’t touch the outer thirds of the lower lip too much.
Now Use Very Light Upward Strokes That Fade
Now use very light upward strokes that fade as they reach the edges to connect these central points to the natural corners. The queue should be almost gone. Gently rub with your finger, then tap a little gloss or balm right in the middle.
The End Result Is Soft Corners and a Middle That Feels Like a Pillow
The end result is soft corners and a middle that feels like a pillow, but no one can quite explain why. It’s always tempting to add more to the height or the sides, but that’s when things start to look too much like overlining. It might work on a phone screen, but not in bright light.
What Makes This Believable Is Restraint
When the liner is too close to the outer corners, even a small difference between the skin and the pencil is easy to see. Do your work in steps. First, line up the center, then step back and connect to the corners only where you need to. If you practise this on a slow day, it will come naturally when you wake up before work.
Why This Soft-Blur Method Works on Real Faces Without Filters
The look of this placement is only part of what makes it appealing. Drawing a sharp outline can feel like putting on armour on a hard morning. This gentler approach feels like adding to what’s already there. People see that you look fresh instead of heavily made up.
It also lets you be flexible. The effect still works even if your hand shakes or the line isn’t perfect, because the focus is on the overall impression, not small flaws. That margin for error is more important than most people think, especially on days when your skin or confidence isn’t cooperating.
The method works well in the evening when the light changes from bright bar settings to soft restaurant glow. The lips stay defined in the middle and soft at the edges. They move naturally with your expressions instead of looking stiff. Makeup is made for a face that moves and lives, not for a picture that is frozen.